
How to Swap and Bridge on Ethereum with Relay: A Step-by-Step Guide
Ethereum, with its unmatched security and extensive ecosystem, serves as a platform for numerous innovations to flourish. At Relay, our mission is to simplify complex cross-chain operations, and today we’re focusing on how to seamlessly swap tokens and bridge assets on the Ethereum blockchain using our intuitive platform.
Why Ethereum?
Ethereum is more than just a blockchain—it’s the foundation of decentralized applications, smart contracts, and a thriving ecosystem. As the most established and secure network in the space, Ethereum continues to attract developers, users, and institutional interest. Its robust infrastructure and vast array of tokens make it the ideal environment for executing secure and transparent transactions.
Key Benefits of Ethereum:
- Security: Ethereum’s proven security model underpins a wide range of high-value transactions.
- Ecosystem: Benefit from the most extensive network of decentralized applications and supported tokens.
- Innovation: Ethereum’s vibrant community and ongoing upgrades continuously enhance network performance and scalability.
- Liquidity: With a massive user base and deep liquidity pools, Ethereum offers competitive pricing and reliable execution.
The Relay Advantage
At Relay, we streamline the process of swapping and bridging assets, cutting through the complexities of multiple protocols. Whether you’re a seasoned trader or new to the world of DeFi, Relay offers a unified interface that simplifies cross-chain transactions on Ethereum.
- All-in-One Experience: Execute swaps and bridges without switching between different platforms.
- User-Friendly Interface: Our guided, step-by-step process makes it easy to navigate even if you’re new to blockchain.
- Optimized Transaction Routing: Relay aggregates the best available quotes, ensuring you get competitive rates.
- Enhanced Security: Every transaction is secured with industry-leading practices, ensuring your assets remain safe.
How Relay Simplifies Ethereum Transactions
Traditionally, moving assets on Ethereum might involve multiple steps and interacting with various protocols. Relay removes these hurdles by integrating the entire process into one fluid operation:
- Unified Interface: Manage both token swaps and bridging actions from a single dashboard.
- Automated Processes: Relay handles the backend intricacies—from executing token swaps to initiating cross-chain bridges.
- Optimized Efficiency: Experience lower fees and faster execution times with our smart routing technology.
Step-by-Step Tutorial: Bridging and Swapping on Ethereum Using Relay
Ready to transform your Ethereum experience? Follow our detailed guide below to make your first swap and bridge on Ethereum with Relay.
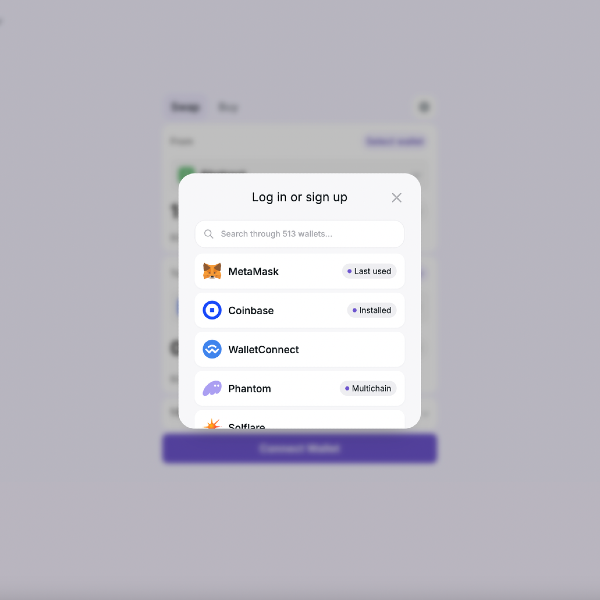
Step 1: Connect Your Wallet
- Action: Launch the Relay app and click on “Connect Wallet.”
- Tip: Use a supported wallet (e.g., MetaMask, WalletConnect) configured for Ethereum.
- Why: Establishing a secure connection is the first step in accessing Relay’s powerful features.
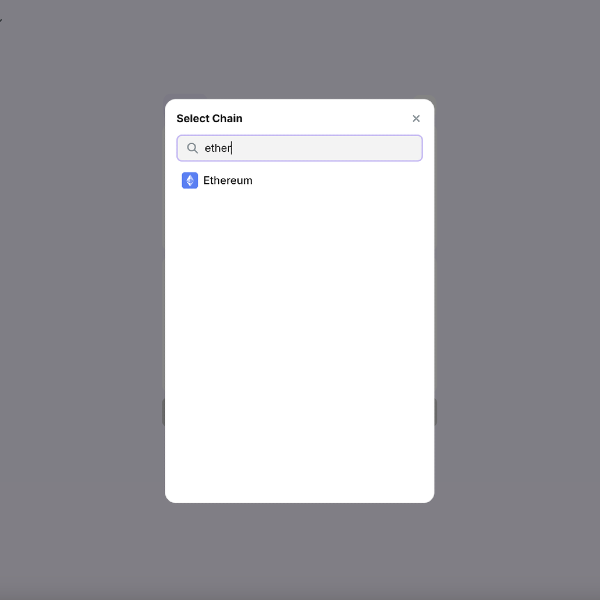
Step 2: Select Ethereum as Your Network
- Action: Once your wallet is connected, choose “Ethereum” from the network options in the Relay interface.
- Tip: Ensure that your wallet is set to Ethereum mainnet to prevent any transaction discrepancies.
- Why: This selection guarantees that your operations are executed on the secure and robust Ethereum blockchain.
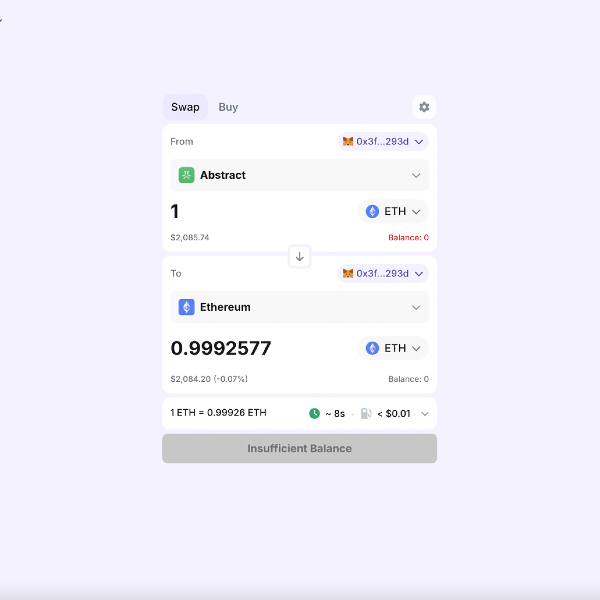
Step 3: Configure Your Swap or Bridge
- Action: Decide whether you want to swap tokens or bridge assets between Ethereum and another network.
- For swaps, select the token you wish to exchange and the token you want to receive.
- For bridging, choose the asset you want to transfer from Ethereum to your destination chain (or vice versa).
- Tip: Double-check token addresses, amounts, and network details to ensure accuracy.
- Why: Proper configuration of transaction parameters is critical for a smooth and error-free process.
Step 4: Initiate the Transaction
- Action: Click “Swap & Bridge” to commence the operation.
- Tip: Relay will provide a transaction summary, including fees, estimated confirmation time, and other essential details—review these carefully.
- Why: This step bundles multiple actions into one streamlined process, reducing complexity and saving you time.
Step 5: Approve the Transaction in Your Wallet
- Action: Your wallet will prompt you to confirm the transaction. Approve the operation after verifying the details.
- Tip: Ensure you have enough ETH to cover any associated gas fees.
- Why: Wallet approval is the final confirmation needed to broadcast your transaction onto the Ethereum network.
Step 6: Monitor Your Transaction
- Action: Use the Relay dashboard to keep track of your transaction’s progress.
- Tip: The interface provides real-time updates, so you can see when your assets have been successfully swapped or bridged.
- Why: Monitoring helps you stay informed and quickly address any potential issues that may arise during the process.
Step 7: Enjoy Your New Tokens or Bridged Assets
- Action: Once your transaction is confirmed, check your wallet to see your new tokens or bridged assets.
- Tip: Refresh your wallet interface to view updated balances.
- Why: The final step confirms the successful completion of your cross-chain operation on Ethereum using Relay.
Ethereum continues to be the cornerstone of the DeFi revolution, and with Relay, you can make the most of its vast ecosystem without the hassle of managing multiple platforms. Our seamless, secure, and efficient solution empowers you to swap tokens and bridge assets effortlessly—allowing you to focus on maximizing your digital strategy.
Experience the power and simplicity of Ethereum transactions with Relay today, and join a community that’s pioneering the future of decentralized finance.